OpenTK Tutorial 3 - Enter the Third Dimension
Now that we’ve draw one triangle the right way, let’s add some real depth to our image. Here we’ll be drawing a cube and rotating it so we can see our work from a different angle.
Let’s start with what we had at the end of the previous tutorial. It draws a triangle to the screen using a vertex array (instead of using the outdated immediate mode). We set up two shaders, so we can output colors and vertices fairly easily, too.
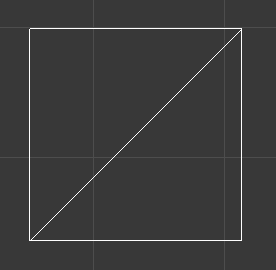
To draw a cube, we need to figure out how to express it as a sequence of vertices. We’re drawing it from a set of triangles, so let’s look at how a square is broken up:
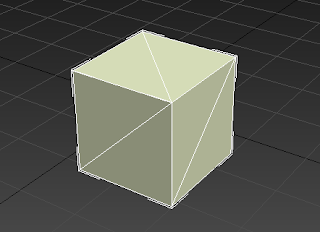
 If we apply this to each side of a cube, we get something like this:
We have to figure out how to recreate this in OpenTK. One way would be to give it all the vertices for each triangle, which comes to 36 vertices (which is 108 floats for a simple cube!). However, we can accomplish this with a lot less work, only giving it 8 vertices. We’ll figure out all the points we want to draw first, and then we can give OpenTK a list of vertices to draw in order, and it’ll send them off to the graphics card with less work for us.
This list of vertices (indices, actually) will need its own array for storage. Each indice is an int that acts as a pointer to a vertex we’ve already defined.
Add this code to the Game class, right after the other arrays are defined:
int[] indicedata;
Now, we’ll need to add the vertices. Replace the existing vertdata code in OnLoad with this:
            vertdata = new Vector3[] { new Vector3(-0.8f, -0.8f,  -0.8f),
                new Vector3(0.8f, -0.8f,  -0.8f),
                new Vector3(0.8f, 0.8f,  -0.8f),
                new Vector3(-0.8f, 0.8f,  -0.8f),
                new Vector3(-0.8f, -0.8f,  0.8f),
                new Vector3(0.8f, -0.8f,  0.8f),
                new Vector3(0.8f, 0.8f,  0.8f),
                new Vector3(-0.8f, 0.8f,  0.8f),
            };
We’ll also want to add the following to OnLoad:
            indicedata = new int[]{
                //front
                0, 7, 3,
                0, 4, 7,
                //back
                1, 2, 6,
                6, 5, 1,
                //left
                0, 2, 1,
                0, 3, 2,
                //right
                4, 5, 6,
                6, 7, 4,
                //top
                2, 3, 6,
                6, 3, 7,
                //bottom
                0, 1, 5,
                0, 5, 4
            };
This creates a list of vertices to use for each side. Each group of three defines a triangle using the vertices we already have defined.
In order to draw with this new data, we have to change a few more things.
First, we’ll need to get another buffer object to put our indice data into. Where we defined vbo_position and vbo_color, add:
int ibo_elements;
Now, in initProgram, we’ll need to add in the following code after where we generate buffers for position, color, and view:
GL.GenBuffers(1, out ibo_elements);
We’re closer, but we still have to write to the buffer and use it to draw. In OnUpdateFrame, add:
            GL.BindBuffer(BufferTarget.ElementArrayBuffer, ibo_elements);
            GL.BufferData(BufferTarget.ElementArrayBuffer, (IntPtr)(indicedata.Length * sizeof(int)), indicedata, BufferUsageHint.StaticDraw);
This sends the array we stored our indices in to the graphics card.
There’s one last step we need to do to draw the cube. In OnRenderFrame, we need to replace our call to GL.DrawArrays with:
GL.DrawElements(BeginMode.Triangles, indicedata.Length, DrawElementsType.UnsignedInt, 0);
If you run the program now, you’ll see a rainbow rectangle:
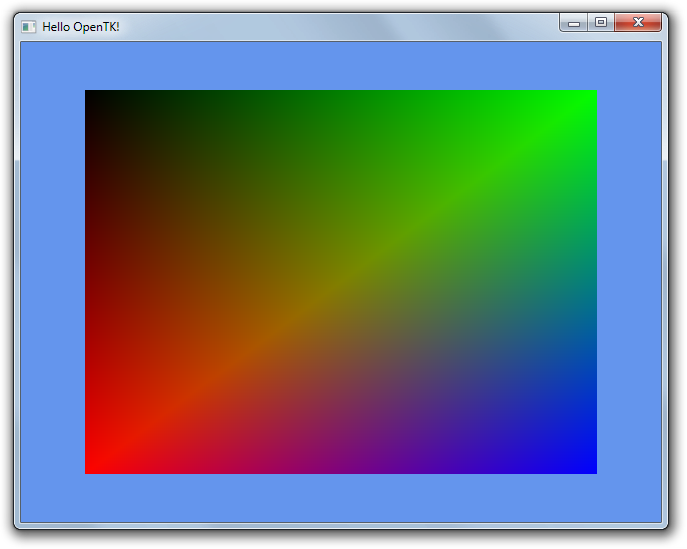
The rest of the cube is there, but we have no way to see it. The front of the cube is facing us, so it blocks out the other sides. To see the other sides, we either need to move it or rotate it. We’re going to make it spin, although we’ll need to move it too (since otherwise it’ll have holes in it where it goes behind the camera).
In OnUpdateFrame, before we call GL.UniformMatrix4 to send our modelview matrix to the graphics card, add this code:
mviewdata[0] = Matrix4.CreateRotationY(0.02f) * Matrix4.CreateRotationX(0.015f) * Matrix4.CreateTranslation(0.0f, 0.0f, -3.0f) * Matrix4.CreatePerspectiveFieldOfView(1.3f, ClientSize.Width / (float)ClientSize.Height, 1.0f, 40.0f);
A note about this code: here we have two different things being done at once that should really be separated. Right now it’s not that important, but a later tutorial will include making the perspective and view matrices separate from the model matrix (when we have more than one model, we should reuse the other two). Also, if you’ve used OpenGL in the past, you’ll note the order of operations being off here, since in a shader you would have perspective before transformations. OpenTK does it different (matrices are transposed compared to OpenGL), requiring us to switch things around.
If you run it now, you’ll see that things are a little different:
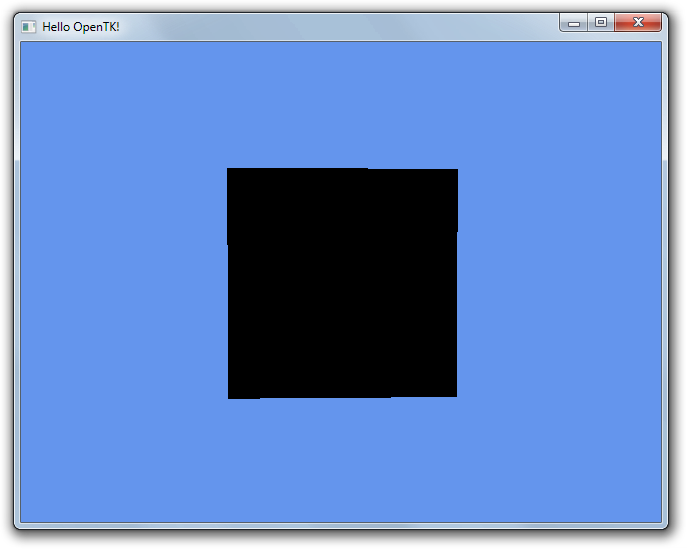
Now it looks more like a square (it’s rotated, so it’s not perfect from this viewpoint), but it turned black. We just forgot to add more colors for the other vertices. Replace the coldata part of OnLoad with the following:
coldata = new Vector3[] {
                new Vector3(1f, 0f, 0f),
                new Vector3( 0f, 0f, 1f),
                new Vector3( 0f,  1f, 0f),
                new Vector3(1f, 0f, 0f),
                new Vector3( 0f, 0f, 1f),
                new Vector3( 0f,  1f, 0f),
                new Vector3(1f, 0f, 0f),
                new Vector3( 0f, 0f, 1f)
};
Now, let’s get it spinning! First we need a variable to keep track of time. Add the following to the Game class:
float time = 0.0f;
In OnUpdateFrame, we need to add our delta (time since last update) to this variable. OpenTK gives us this through the FrameEventArgs object the event gets passed. Add this code to the beginning of OnUpdateFrame:
time += (float)e.Time;
Now it keeps track of time, but we need to do something with it. Replace the line where we set mviewdata[0] in OnUpdateFrame with:
mviewdata[0] = Matrix4.CreateRotationY(0.55f * time) * Matrix4.CreateRotationX(0.15f * time) * Matrix4.CreateTranslation(0.0f, 0.0f, -3.0f) * Matrix4.CreatePerspectiveFieldOfView(1.3f, ClientSize.Width / (float)ClientSize.Height, 1.0f, 40.0f);
Run it and watch the cube!
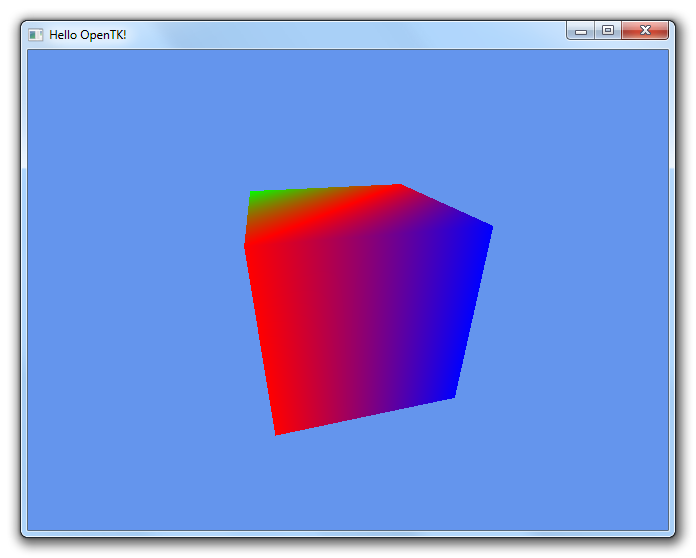
You might notice the edges of the cube are a little jagged when it’s rotated. We can fix that by making a new constructor for the Game class that tells it to use multi-sampling:
    public Game() : base(512,512, new GraphicsMode(32,24,0,4))
    {

    }
This code tells it to create a window 512 by 512 pixels, with 32-bit color depth, 24 bits in the depth buffer, no stencil buffer, and 4x sampling for anti-aliasing, assuming your computer supports it. With this setting, things look a little bit nicer:
